How to make a DIY Picture Ledge
Learn how to make a DIY picture ledge for a great way to display your favorite family photos. It allows you to switch out and rearrange photos with ease with no damage to your wall. Make this shelf and turn a large blank wall into something fabulous.

Make this 6 foot long picture ledge for less than $25.
I have had this blank wall in my living room since we moved in 3 years ago. I debated what to do with it that wouldn’t look too busy or cluttered. To display some of my favorite family photos, I wanted something that could be easily changed up whenever the mood struck me. By learning how to make a DIY picture ledge, I could display an array of photos in different sizes without putting too many holes in my wall every time I wanted to change it up. This is the perfect way to pull that off.
After looking for similar shelves of this length online, I decided they were way too pricy. Soon after I set off to Home Depot for a few pieces of lumber.
Here’s what we used:
- Two “common boards” measuring 1 inch deep x 2.5 inches wide x 6 inches long
- One board measuring 1 inch x 1.5 inches x 6 inches
Total cost: Approximately $17.00
Using stain I already had on hand, I laid out the boards on some sawhorses and started making them the rich dark walnut color I am loving lately. With the required dry time, this took me a few hours to complete, but was so worth the wait. The boards turned out beautiful.

We assembled this picture ledge in minutes.
Once the boards were dry, I got my husband to help nail them together with a nail gun and 1-3/4 inch brad nails. After holding the boards in perfect alignment, we got to work nailing them together. Within just a few minutes these 3 boards came to life as the vision in my head. I love it when that happens.

The boards go together like this:

One of the 2.5 inch boards will be your back, which goes against the wall
The second 2.5 inch board is your base, where your picture frames will sit
The third board (the 1.5 inch board) is attached to the front to make the “ledge”. This finishes the look and keeps your frames from sliding off the shelf.
Secure to your wall with screws.

After finding the studs on our wall, we used those to secure our new DIY Photo Ledge to the wall with screws. We didn’t pre-drills holes, we just screwed them right in where we needed to make sure they were secure and would have a good hold.
We used black screws, which camouflaged well with the dark stain. As this back board is mostly covered with photos, I wasn’t worried too much by the screws anyhow.
What frames to use?

I had one large family photo that I wanted to be the main focus. This photo is an 11 x 14 in a 16 x 20 frame. The other photos are in a variety of sizes. Also, I wanted more contrast, so the remaining photos are facing not all the same direction. (Some are in landscape and some are standing upright). I also liked that, while all are the same color frames, they are different: Some having matting, some are clear. Two of the photos are in color and two are in black and white.
I got these thin gallery frames from the Room Essentials line at Target. I absolutely love them!
This once empty wall now has a purpose. I love how it turned out, and it was SO SIMPLE.
Looking for something else easy to hang up?

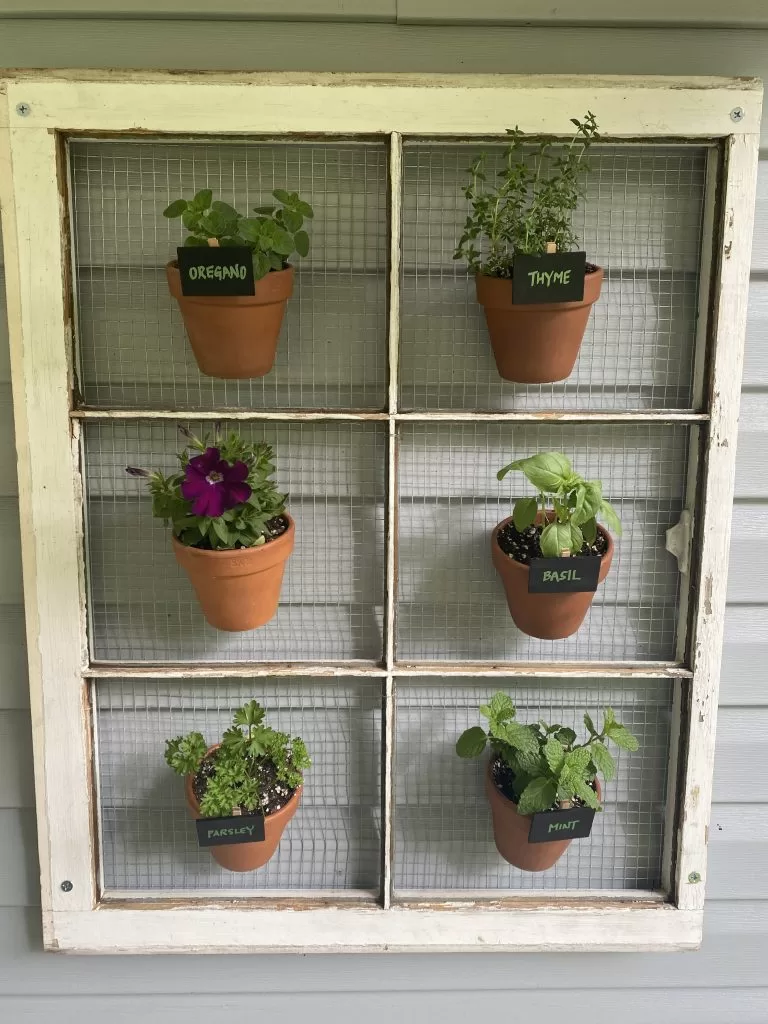
Try this Easy DIY Herb Garden using an old window… just as quick a project that looks great!
Don’t forget to pin this for safekeeping!

From my home to yours,