How to Make Homemade Granola
If you love yogurt and fruit, you need to know how to make homemade granola. Forget the prepackaged kinds that are full of preservatives and make this yourself, with all natural ingredients, in less than an hour.

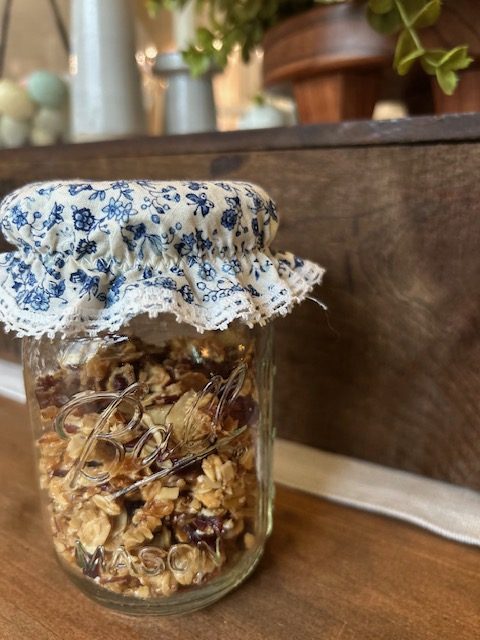
This Homemade Granola makes enough to eat for days.
It’s easy to double this recipe and make more if several people in your house are eating it. For just me to eat with my yogurt parfaits, this recipe makes just enough for me to enjoy for a week or two, leaving none to go to waste. It stores easily in a sealed plastic container or glass jar, and looks pretty sitting on the counter (reminding you to eat it ALL).
I love these Better Homes & Gardens Flip-Tite Food Storage Containers from Walmart. They vacuum seal and are as pretty as they are functional. I have used them in my kitchen to store everything from pasta to snacks and they work great.
It’s easy to substitute your own favorite dried fruits and nuts.
My suggestion here is to keep in mind the ratio of nuts and berries to oats, which is about 1:2, or 1 cup fruit and 1 cup nuts to 2 cups of oats. The oats need to be your primary ingredient.
Other suggestions for nuts instead of just almonds:
- Chopped pecans
- Chopped walnuts
- Sunflower seeds
- Pumpkin seeds
- Chia seeds
- Sesame seeds
- Shredded coconut
I use dried cranberries, just because of how much I love them. Some recipes call for adding the dried fruit AFTER baking. I always add them with the mix right in the oven, and have never had a problem. Several dried fruits could work well here, depending on your preference. This could include:
- Dried bananas
- Dates
- Raisins
- Apricots
This takes less than 10 minutes to mix together.
step 1:
Simply mix the dry ingredients together in a medium mixing bowl. This includes the old-fashioned oats, cranberries, almonds, salt and cinnamon sugar. Combine and set aside.

step 2:
Next, combine the remaining ingredients on the stovetop until a syrup like consistency. This includes the brown sugar, honey and oil. It takes literally minutes to combine. Make sure to stir consistently to avoid burning.

step 3:
After thoroughly coating the oat mixture with the honey mixture, the granola is ready to be spread onto a rimmed baking sheet covered in parchment paper.

STEP 4:
Bake it low and slow.

Bake at 300 degrees for about 20-30 minutes, pulling out every few minutes to stir the granola mixture to avoid burning.
If it happens to clump together, just simply break it apart after it cools. I find that pulling the parchment paper off the baking sheet and onto a cooling rack helps it cool faster with less sticking.
You can eat this on more than just yogurt.
- As an ice cream topping, topped with caramel sauce
- In cereal
- On salads: My favorite is grilled chicken salad with strawberries and homemade vinaigrette dressing
- Mixed with chocolate candy, pretzel pieces, cashews and raisins to make your own trail mix
Want another homemade breakfast idea?

Make all kinds of variations of homemade pancakes and waffles such as these Blueberry and Yogurt Waffles, all from scratch.
Want to save this simple recipe for later? You can do that too.

Print off the recipe below:
Homemade Granola
Ingredients
- 2 cups old fashioned oats
- 1 cup dried cranberries
- 1 cup chopped walnuts or almonds
- 1 tsp Kosher salt
- 1/2 tsp cinnamon sugar
- 1/2 cup packed brown sugar
- 1/2 cup honey
- 1/2 cup EVOO or vegetable oil
Instructions
- Preheat oven to 300 degrees.
- Line baking sheet with parchment paper.
- In a medium mixing bowl, combine oats, nuts and cranberries.
- Add in Kosher salt and cinnamon sugar.
- On the stovetop, combine brown sugar, honey and oil. Cook over medium heat until it starts to bubble, stirring consistently.
- Remove from heat and add to oat mixture.
- Turn over mixture until all dry ingredients are thoroughly combined with honey mixture, using a rubber spatula or wooden spoon.
- Spread in an even, thin layer on the baking sheet.
- Bake at 300 degrees for 30 minutes, turning granola every few minutes to avoid burning.
- Allow to completely cool on a cooling rack. When cooled, break apart any large chunks into small pieces.
- Store in a plastic sealed container or glass jar for up to 2 weeks.
From my home to yours,